HERO-Label

- 🔥 Automation: Rapid automated labeling can be performed based on existing models.
- ✔️ Humanization: Includes many widgets and shortcuts to greatly accelerate the efficiency of dataset annotation.
- 👀 Extensibility: Based on HERO-Deploy, it can be easily extended with a wide range of annotation tasks, and numerous features can be personalized.
Project Introduction
This is a semi-automated annotation software for assisted dataset labeling. With automation, humanization, scalability and other characteristics, can greatly improve the efficiency of data set annotation. In computer vision related tasks, we often need to use a large number of datasets, especially in some of our applications in the competition for specific scenes of the dataset often need to label, and labeling datasets is often a very boring and time-consuming thing. In order to reduce the labeling dataset labor cost investment developed this project, you can manually label a certain amount of datasets, and then the image “automatic labeling”, of course, a small number of data sets in the early stage of the realization of the results are not necessarily very good, but also can be fine-tuned manually, to get the final dataset labeling file.
The inference of the model is realized based on HERO Deploy, and currently only supports object detection dataset and key point dataset annotation.
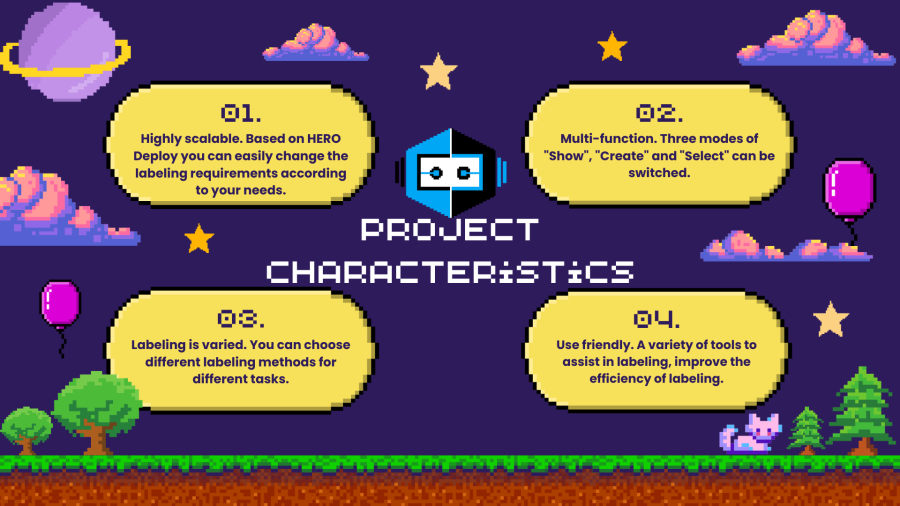
Project Characterstics
Project usage
The model inference part of this project is developed based on HERO-Deploy, please refer to HERO Deploy before use and modify the relevant configuration files according to your own needs. HERO Deploy can realize the convenient deployment of different types of models.
There are three modes to choose from when you start the program, namely “show”, “select” and “create”, and the default mode is “show” when the program is first started. In “show” mode you can switch back and forth between pictures, through the keyboard keys and the mouse can realize this function, which way you can use according to your own habits to change.
There are four ways to create a label to choose from, namely, all automatic labeling, single automatic labeling, manual labeling by way of punctuation and manual labeling by way of labeling the smallest external rectangle, the creation of labels will enter the “create” mode. The first way you just need to press the space bar to automatically use your configured model to label all the pictures at once on behalf of the label, the second way to press the key will only label your current picture, the third way you need to select the points you want to label through the mouse in turn. The fourth way is by labeling a minimum outer rectangle, in this rectangle ROI area using the model to automatically generate the labeling results.
The use of automatic labeling, it is necessary to manually fine-tune the automatically generated labels, select the need to adjust the label will enter the “select” mode, there are two ways to select the label, the first is to click directly on the corresponding label position can be, the second is that the lower right corner will show all the labels in the figure of the number, you can click on the corresponding number of the selection. After selection, if you need to adjust the category, you can click on the drop-down menu in the upper right corner to select, adjust the position of the point when clicking on the corresponding point to drag.